Imagine fresh, vibrant blooms brightening your home even when it’s chilly outside. What if I told you you could achieve this with no soil, just a few pebbles, water, and some bright light? It’s true! Water-forcing bulbs is a delightful and easy way to bring the joy of spring indoors, transforming your living space into a blooming haven.
This method is perfect for anyone, whether you’re a seasoned gardener looking for a simple winter project or a newbie eager to see some quick, rewarding growth. Let’s dive into how you can cultivate stunning flowers right on your windowsill!
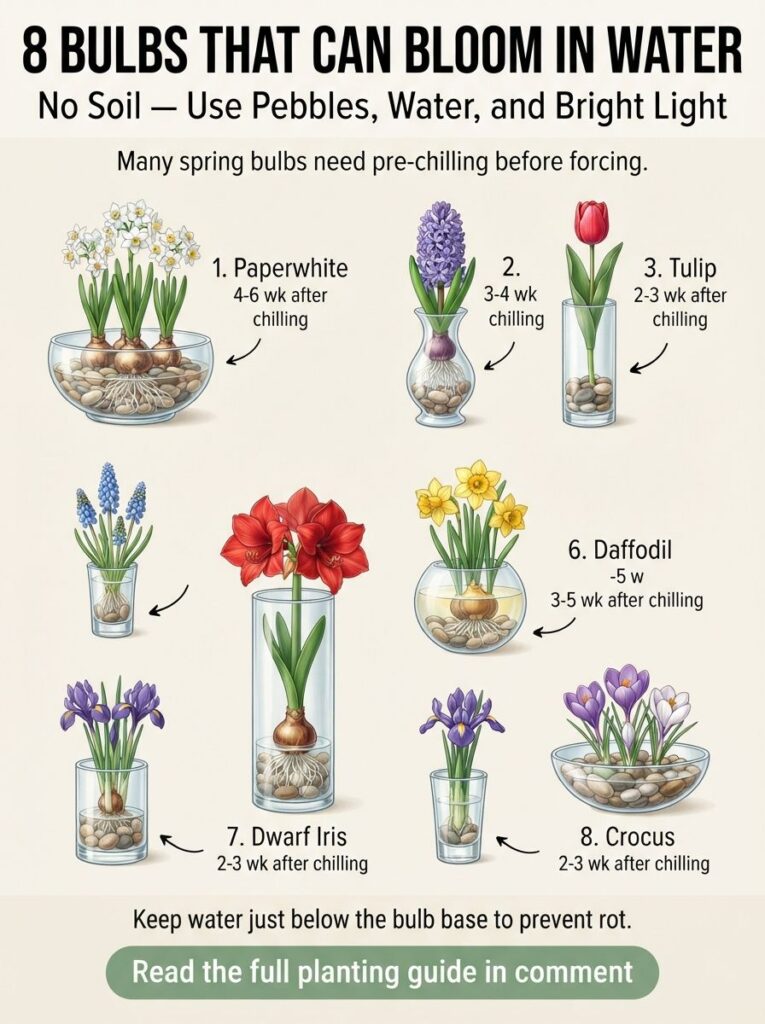 Discover which bulbs are perfect for water-forcing to bring indoor beauty, along with their chilling requirements.
Why Choose Water-Forcing Bulbs?
Water-forcing offers a unique charm that traditional potting doesn’t. Here are a few reasons why you might love it:
- It’s Clean and Easy: No messy soil! Just clear containers, decorative pebbles, and water. It’s a fantastic option for those with limited space or who prefer a cleaner gardening experience.
- Visual Delight: You get to watch the entire process, from root development to sprout growth and, finally, the glorious bloom. It’s a living science experiment and a beautiful display all in one, offering a deeper connection to nature’s cycles.
- Scent-sational Experience: Many forced bulbs, like Hyacinths and Paperwhites, fill your home with a wonderful fragrance, creating an inviting and refreshing atmosphere.
- Instant Decor: A beautiful bulb arrangement can serve as a stunning centerpiece or a cheerful accent on a desk or shelf, adding natural elegance to any room.
Your Simple Guide to Water-Forcing Bulbs
Getting started is incredibly straightforward. Here’s what you’ll need and how to do it:
The Essentials You’ll Need:
- Healthy Bulbs: Choose firm, unblemished bulbs from a reputable nursery or garden center. Quality bulbs are key to success.
- Glass Containers: Vases, jars, bowls, or special bulb-forcing glasses. The key is that the bulb should sit just above the water level, allowing roots to grow down without the bulb itself getting waterlogged. Clear glass lets you observe the root growth!
- Pebbles or Decorative Stones: These provide support for the bulb and add a nice aesthetic touch. You can also use marbles, glass beads, or even clean gravel.
- Clean Water: Tap water is usually fine. Just make sure it’s not softened water, which can contain salts that aren’t good for plants.
- Bright Light: Once sprouts appear, they’ll need a sunny spot to encourage strong, healthy growth and vibrant blooms.
Step-by-Step Instructions:
- Choose the Right Container: Select a container that allows the base of your bulb to be near the water without being fully submerged. Specialized bulb-forcing vases have a narrow neck for this purpose, perfectly cradling the bulb.
- Layer with Pebbles: Add a layer of pebbles or decorative stones to the bottom of your container, about 1-2 inches deep. This creates a stable base and allows space for root development.
- Place Your Bulb: Set the bulb on top of the pebbles, pointed side up. Ensure the bulb is stable and won’t tip over. You can nestle it gently into the pebbles for added stability.
- Add Water: Carefully pour water into the container until it just touches or is slightly below the very bottom of the bulb. This is a crucial step! If the bulb sits directly in water, it can rot. The roots will grow down into the water, while the bulb itself stays dry.
- Provide Chilling (If Needed): Many spring bulbs require a period of cold before they will sprout and bloom. This mimics winter and tells the bulb it’s time to prepare for spring. Place bulbs needing chilling in a cool, dark place (like a refrigerator, unheated garage, or cool basement) for the recommended time.
- Provide Bright Light (After Chilling/Sprouting): Once the chilling period is over and you see green sprouts, or for bulbs that don’t require pre-chilling, place your container in a spot with bright, indirect light. A sunny windowsill is often perfect.
- Maintain Water Levels: Check the water level every few days. Replenish as needed, ensuring it consistently stays just below the bulb’s base.
Understanding Chilling Time for Beautiful Blooms
The chilling period is nature’s way of preparing many spring bulbs for flowering. It simulates winter, triggering the biochemical processes needed for bloom development. Without it, many bulbs won’t flower or will produce weak, leggy growth. The duration varies greatly by bulb type.
Specific Bulb Care: Your Indoor Garden Stars
Here’s a closer look at some popular bulbs perfect for water-forcing, along with their specific needs:
Paperwhite Narcissus
- Characteristics: Known for their intensely fragrant, delicate white blooms, Paperwhites are incredibly easy to force and don’t require pre-chilling. They grow quickly, often blooming in 3-5 weeks.
- Care Tips: Place them in a sunny spot immediately after setting them up. Their stems can get leggy, so consider adding small stakes or tying a ribbon around the foliage for support as they grow.
- Chilling Time: 0 weeks (no chilling needed).
Hyacinth
- Characteristics: Highly prized for their vibrant, bell-shaped flowers and strong, sweet fragrance. They come in beautiful shades of blue, pink, white, and purple.
- Care Tips: After chilling, move to a cool, dimly lit spot to encourage root growth before introducing to brighter light. Support the heavy flower stalks if they start to lean.
- Chilling Time: 10-14 weeks.
Tulip
- Characteristics: While less commonly water-forced than other bulbs, certain shorter varieties can succeed. They offer a classic spring look with their iconic cup-shaped blooms.
- Care Tips: Tulips require a longer and consistent chilling period. Keep them in a very cool spot with bright light once they sprout to prevent legginess.
- Chilling Time: 14-16 weeks.
Muscari (Grape Hyacinth)
- Characteristics: These charming, petite bulbs produce clusters of tiny, bell-shaped flowers resembling bunches of grapes, often in shades of blue. They have a subtle, sweet scent.
- Care Tips: Muscari are generally hardy and forgiving. Provide bright light once sprouts emerge.
- Chilling Time: 12-15 weeks.
Amaryllis
- Characteristics: Famous for their enormous, show-stopping trumpet-shaped flowers, Amaryllis bulbs are a winter favorite. They don’t typically require chilling.
- Care Tips: Plant the bulb so the top third remains exposed above the pebbles. They prefer bright, indirect light and can get quite tall and heavy, often benefiting from staking.
- Chilling Time: 0 weeks (often sold pre-chilled or as ‘prepared’ bulbs).
Daffodil
- Characteristics: Cheerful and bright, daffodils (including smaller varieties like ‘Tête-à-tête’) are beloved for their trumpet-shaped blooms.
- Care Tips: After chilling, ensure they receive plenty of bright light. Rotate the container regularly to promote even growth and prevent leaning towards the light source.
- Chilling Time: 12-15 weeks.
Dwarf Iris (Iris reticulata)
- Characteristics: These small, early-blooming irises offer intricate, beautiful flowers, often in shades of blue and purple, appearing very early in the season.
- Care Tips: Their delicate nature makes them a lovely indoor display. Ensure consistent water levels.
- Chilling Time: 13-15 weeks.
Crocus
- Characteristics: Among the first signs of spring, crocuses are small, cup-shaped flowers that open wide in sunlight. They come in various colors, including purple, white, and yellow.
- Care Tips: You might need to place several small crocus bulbs in one container for a fuller display. They respond well to bright light after chilling.
- Chilling Time: 12-15 weeks.
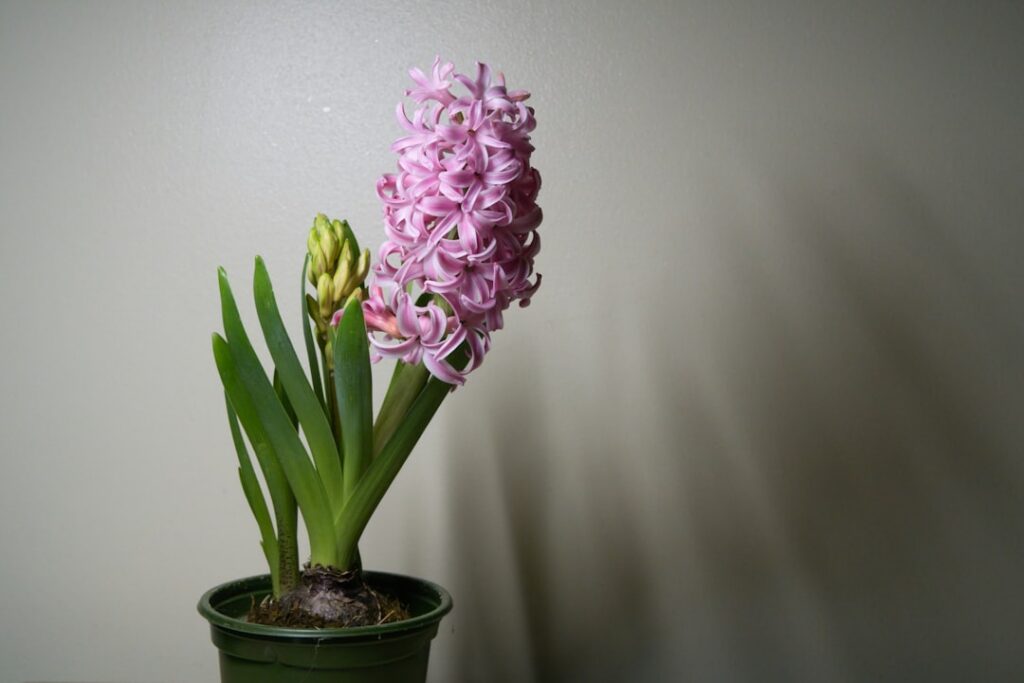 Observe the delicate root system developing in the water, a key part of water-forcing success.
Troubleshooting Common Water-Forcing Issues
Even with the best intentions, you might run into a snag or two. Don’t worry, it happens to every gardener!
- Bulb Rot: The most common issue. This happens if the bulb sits directly in the water. Always ensure the water level is just below the bulb’s base. If you notice a mushy or foul-smelling bulb, remove it immediately to prevent issues with other bulbs.
- Leggy Growth: If your sprouts are long, thin, and pale, they’re likely not getting enough light. Move them to a brighter spot. For some, like Paperwhites, a splash of rubbing alcohol (about 5-10% of the water volume) can help stunt growth without harming the plant, leading to sturdier stems.
- No Blooms: This usually points to insufficient chilling time. Some bulbs are very particular about their cold rest. Ensure you’ve met the chilling requirements for your specific bulb type.
- Algae Growth: Direct sunlight can encourage algae in clear containers. If you notice a green film, gently clean the container and replace the water. Placing the container in a spot with indirect light might help.
Beyond the Bloom: What to Do Next?
Once your bulbs have finished flowering, their indoor journey is usually complete. Most forced bulbs expend all their energy producing those beautiful indoor blooms and won’t re-bloom successfully in water. However, some can be planted outdoors!
For bulbs like Hyacinths, Daffodils, and Tulips, you can try planting them in your garden after the last frost. They might not bloom the following spring, but with a year or two to recover their energy in the soil, they could surprise you with future flowers. Paperwhites and Amaryllis, however, are usually considered annuals for water-forcing and are best composted after flowering.
Embrace the Indoor Bloom
Water-forcing bulbs is a truly rewarding experience, offering a simple way to bring life, color, and fragrance into your home during the colder months. It’s a testament to nature’s resilience and a delightful project for gardeners of all levels. By understanding the unique needs of each bulb, especially their chilling requirements and water levels, you’re set to create stunning displays that will brighten your spirits and your home. So go ahead, pick out your favorite bulbs, and let the magic of water-forcing begin!