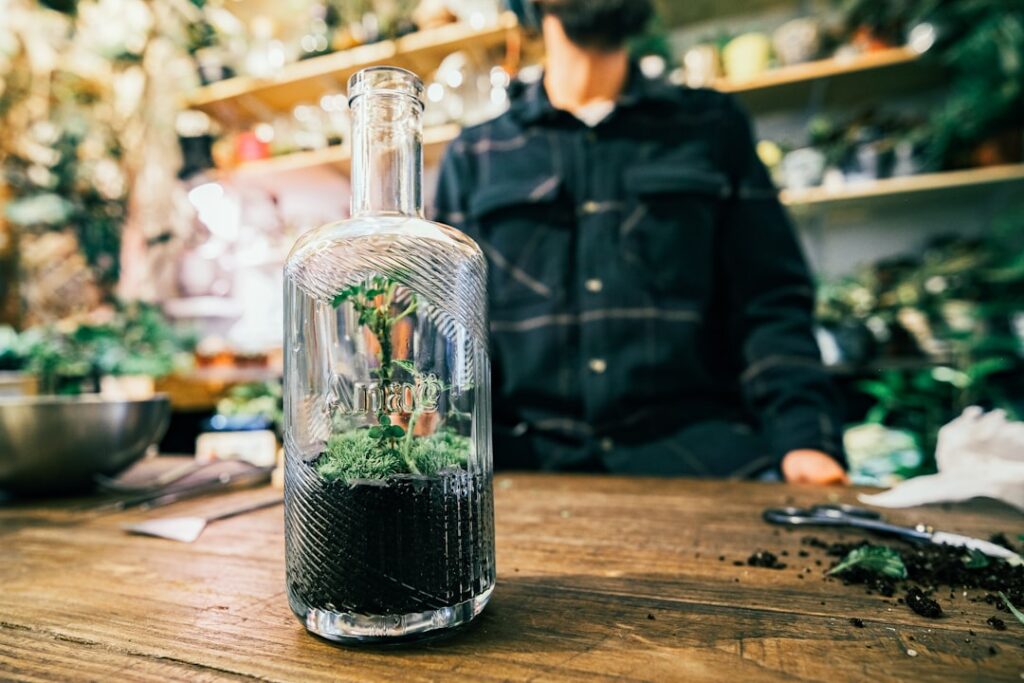
Hey there, fellow garden lovers! Have you ever dreamed of bringing a little piece of nature indoors, a self-sustaining miniature world that adds beauty and calm to your home? Well, you’re in for a treat! Today, we’re going to dive into the wonderful world of terrariums. Think of them as tiny ecosystems under glass – beautiful, fascinating, and surprisingly easy to create once you know the ropes.
Building a terrarium isn’t just a fun DIY project; it’s a way to connect with plants, nurture a living piece of art, and enjoy greenery even if you have limited space or a busy schedule. Let’s roll up our sleeves and get started on creating your very own little botanical haven!
Understanding Terrariums: Open vs. Closed
Before we gather our supplies, it’s good to know that terrariums mainly come in two types:
Closed Terrariums:
- These are sealed containers, like jars with lids or bell-shaped glass, that create a self-contained environment. The moisture from the plants evaporates, condenses on the glass, and drips back down, essentially creating a tiny rain cycle. This makes them incredibly low-maintenance once established, perfect for humidity-loving plants like ferns and mosses.
Open Terrariums:
- These have an open top or large opening, allowing for more air circulation. They are ideal for plants that prefer drier conditions, such as succulents, cacti, or air plants, as they prevent excess humidity from building up.
For this guide, we’ll mostly focus on the classic closed terrarium, but many of the principles apply to open ones too!
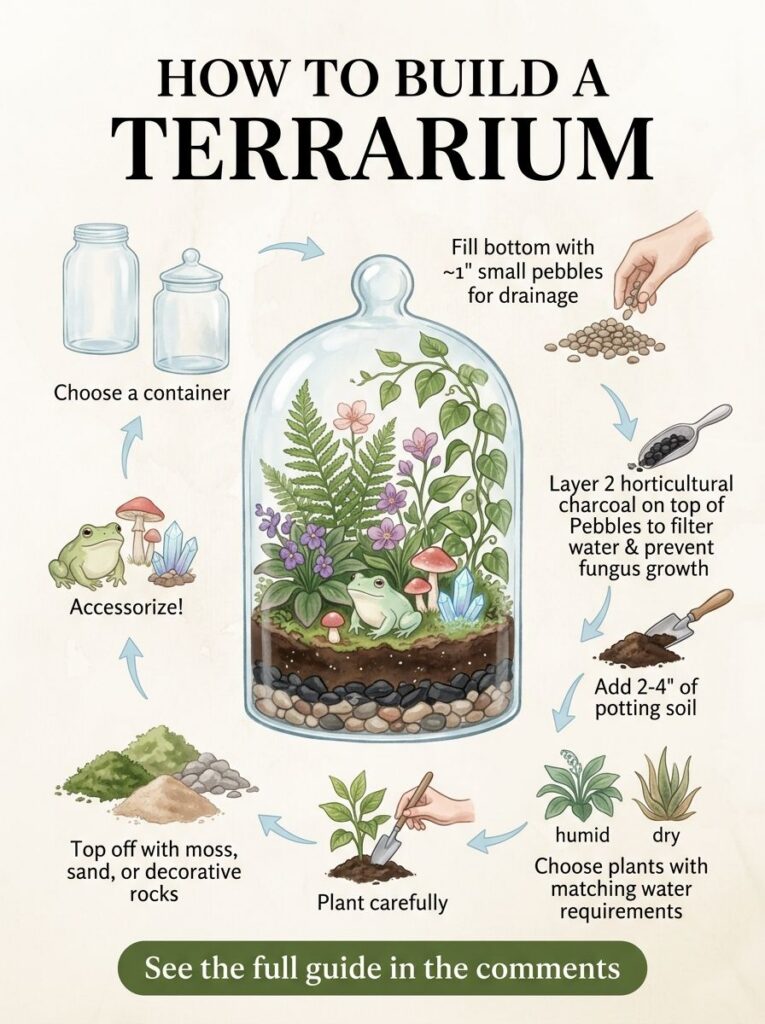 This infographic visually breaks down the essential steps for creating your terrarium.
Gathering Your Terrarium Building Supplies
No great project starts without the right tools! Here’s what you’ll need:
- Glass Container: A clear, clean glass jar, bowl, or bell-shaped container. Make sure it has a wide enough opening for you to work through.
- Pebbles or Gravel: For your drainage layer. Small river stones or aquarium gravel work perfectly.
- Horticultural Charcoal: This essential layer helps with drainage, filters the water, and keeps your terrarium smelling fresh.
- Potting Mix: Choose a good quality, sterile potting mix. For closed terrariums, a general all-purpose mix is fine; for open terrariums with succulents, use a cactus mix.
- Your Chosen Plants: Small, slow-growing plants that love humidity for closed terrariums, or drought-tolerant plants for open ones.
- Long-Handled Tools: Tweezers, tongs, or small shovels are incredibly helpful for working in tight spaces.
- Spray Bottle: For watering.
- Decorations (Optional): Moss, interesting stones, tiny figurines, or polished crystals to add a personal touch.
Step-by-Step: Crafting Your Terrarium Masterpiece
Step 1: Clean Your Container
Start with a sparkling clean glass container. Wash it thoroughly with soap and water, then rinse well. You want to make sure there are no residues that could harm your plants or encourage mold.
Step 2: The Drainage Layer
This is crucial for preventing root rot, especially in closed terrariums. Add a layer of pebbles or gravel to the bottom of your container, about 1-2 inches deep, depending on the size of your terrarium. This allows excess water to drain away from the soil.
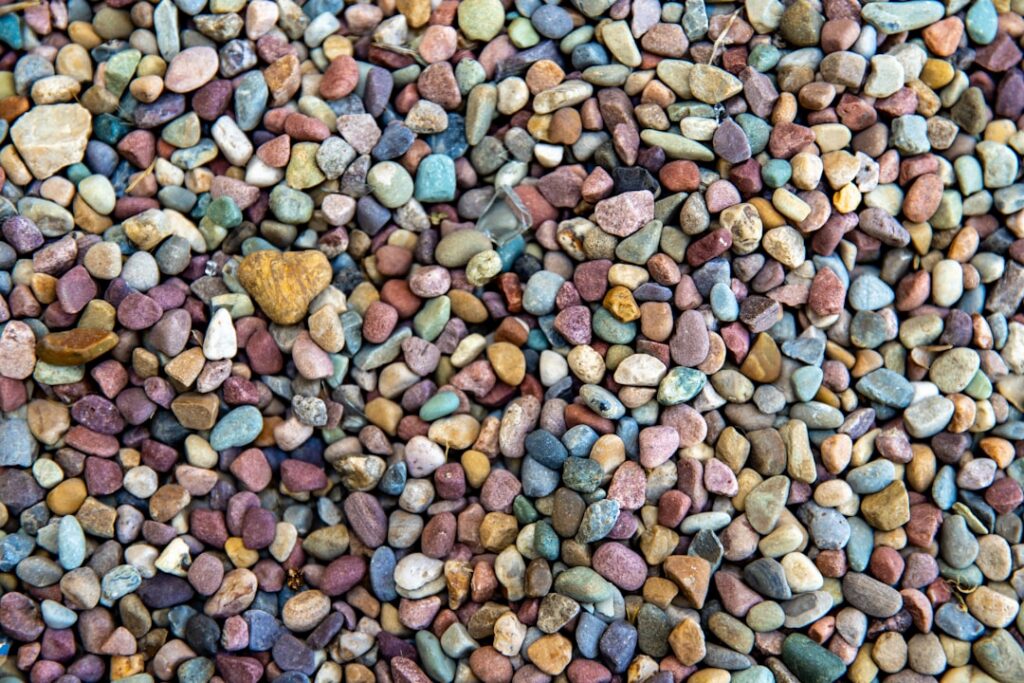 A good drainage layer is the foundation of a healthy terrarium.
Step 3: Add Horticultural Charcoal
Next, sprinkle a thin layer (about 1/2 to 1 inch) of horticultural charcoal over the pebbles. This acts as a natural filter, absorbing impurities and odors, keeping your terrarium fresh and clean over time.
Step 4: Introduce the Potting Mix
Now, it’s time for the soil! Add about 2-4 inches of your chosen potting mix on top of the charcoal. The depth will depend on the size of your plants’ root balls and the overall size of your container. Gently pat it down, but don’t compact it too much.
Step 5: Planting Your Miniature Garden
This is where the magic happens! Carefully remove your plants from their nursery pots, gently shaking off excess soil from their roots. Use your long-handled tools to dig small holes in the potting mix. Place your plants, ensuring their roots are covered, and then gently firm the soil around them. Leave enough space between plants for them to grow a little.
A friendly tip: Think about the final look! Place taller plants towards the back (if your terrarium has a front and back) and smaller plants or mosses in front.
 Long-handled tools make planting in confined spaces much easier.
Step 6: Decorate and Personalize
This is the fun part where you add your personal touch! Arrange mosses, small decorative stones, crystals, or even tiny figurines to create a scene. Moss is excellent for covering bare soil and adding lushness. Just make sure any decorations you add are clean and won’t introduce unwanted chemicals.
Step 7: The Grand Finale – Watering and Sealing
Once everything is in place, give your terrarium a light watering with your spray bottle. You want the soil to be moist, but not waterlogged. For closed terrariums, spray the inside of the glass to clean off any soil particles. Then, place the lid or seal your container. Watch for condensation over the next day or so. If it’s heavily fogged, it might be a bit too wet, so open the lid for a few hours to allow some moisture to escape. If there’s no condensation at all, give it another light misting.
Choosing the Right Plants for Your Terrarium
The success of your terrarium largely depends on choosing plants that thrive in its specific environment:
For Closed Terrariums (Humidity Lovers):
- Fittonia (Nerve Plant): Known for its vibrant, veined leaves.
- Ferns: Maidenhair, button, or asparagus ferns do wonderfully.
- Mosses: Sheet moss, cushion moss – they love high humidity.
- Peperomia: Many varieties are compact and enjoy consistent moisture.
- Baby Tears (Soleirolia soleirolii): Creates a lovely groundcover.
For Open Terrariums (Dry-Loving Plants):
- Succulents: Echeveria, Haworthia, Gasteria.
- Cacti: Small varieties that don’t grow too large.
- Air Plants (Tillandsia): These don’t need soil, just occasional misting!
Caring for Your Terrarium: A Gentle Touch
- Light: Place your terrarium in bright, indirect light. Avoid direct sunlight, which can cook the plants inside.
- Watering (Closed Terrariums): Once established, you might only need to water a closed terrarium a few times a year, or even less! Look for a lack of condensation as a sign it needs a little mist.
- Watering (Open Terrariums): Water these like you would any other houseplant, allowing the soil to dry out between waterings.
- Pruning: If plants start to outgrow their space or touch the glass, gently prune them back with small scissors or tweezers.
- Ventilation (Closed Terrariums): Occasionally open the lid for an hour or so every few weeks to refresh the air and prevent mold buildup.
- Pest Watch: Keep an eye out for any tiny pests. Address them immediately to prevent them from spreading within the enclosed environment.
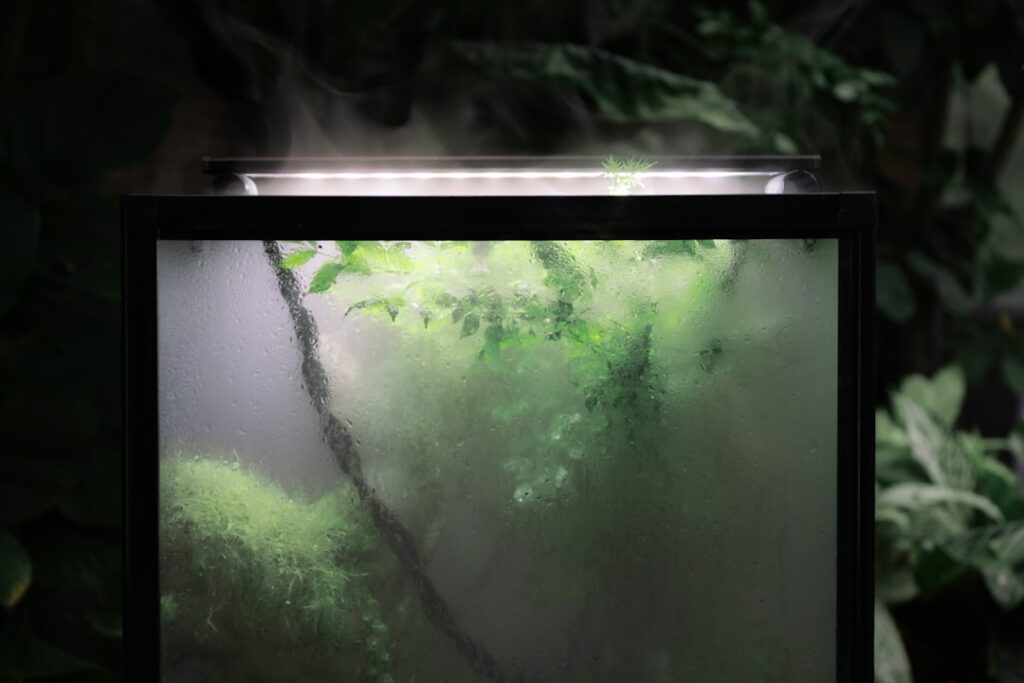 A light misting is often all a closed terrarium needs to stay hydrated.
Your Own Little Ecosystem
Building a terrarium is more than just arranging plants; it’s about creating a living, breathing miniature world that brings a touch of tranquility and natural beauty into your daily life. It’s a wonderful way to observe nature’s cycles up close, even if you don’t have a large outdoor garden.
So, whether you’re a seasoned gardener looking for a new indoor project or a beginner eager to try your hand at plant care, a terrarium is a rewarding venture. It transforms a simple glass container into a thriving, sustainable practice.
Ready to Grow?
I hope this guide has inspired you to create your own terrarium! With these steps and tips, you’re well on your way to enjoying a beautiful, low-maintenance green space right in your home. Happy planting!