Tired of grappling with sprawling, unruly raspberry canes that seem to take over your garden and make harvesting a chore? You’re not alone. Many gardeners face the challenge of managing these vigorous, delicious berry producers. The good news is that achieving a neat, productive, and easy-to-harvest raspberry patch is simpler than you might think. The secret lies in a time-tested technique: a well-designed wire trellis system.
This approach transforms a tangled mess into an organized, fruit-laden hedge, boosting airflow, reducing disease, and making your berry harvest a joy instead of a struggle. Let’s explore how a simple wire trellis can unlock the full potential of your raspberry plants and lead to a more abundant, healthier yield.
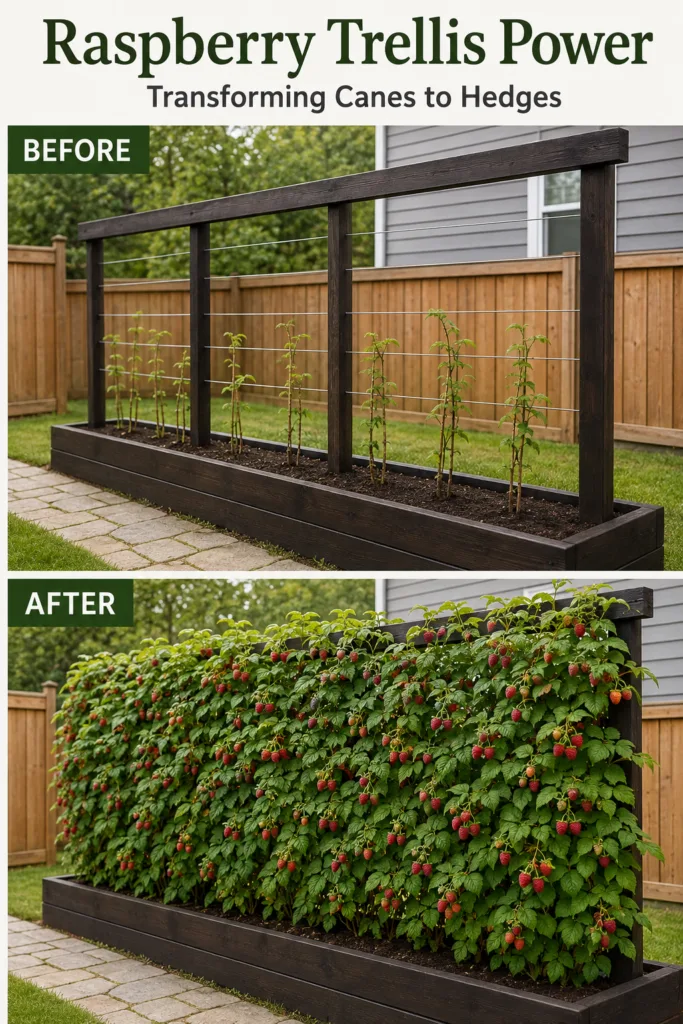
The Power of a Simple Raspberry Trellis
A trellis isn’t just about aesthetics; it’s a foundational element for healthy, productive raspberry growth. Raspberries naturally want to grow tall, and without support, their canes can flop over, become tangled, and create a dense, humid environment that invites pests and diseases. A wire trellis provides the structure your plants need to thrive, offering several key benefits:
- Support and Organization: It keeps canes upright and in neat rows, preventing them from falling onto paths or competing with other plants. This organization makes tending your patch much easier.
- Improved Airflow: By lifting canes off the ground and spreading them out, a trellis increases air circulation around the foliage. This reduces humidity, a major factor in fungal diseases like powdery mildew and botrytis blight.
- Enhanced Sunlight Exposure: When canes are properly spaced and supported, more leaves receive adequate sunlight, which is crucial for photosynthesis and fruit development. This can lead to larger, sweeter berries.
- Easier Harvesting: No more bending and searching through dense thickets! Berries are presented at a convenient height, making picking faster and more enjoyable. You’ll also spot more ripe fruit that might otherwise be hidden.
- Increased Productivity: Healthy plants with good air and light exposure are more productive, leading to a more abundant harvest from the same space.
- Simplified Pruning: A well-trellised patch allows you to clearly see and identify old fruiting canes for removal and new primocanes for training, simplifying your annual pruning tasks.
Choosing the Right Trellis System for Raspberries
For raspberries, simple wire trellis systems are often the most effective. These systems typically consist of sturdy posts with horizontal wires strung between them. Here are common approaches:
Post and Wire System
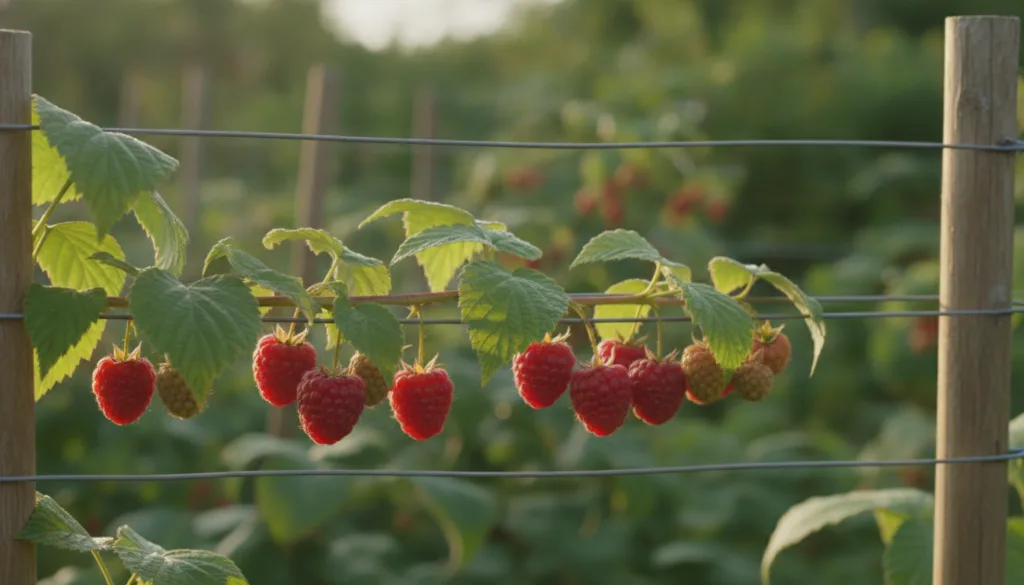
This is the simplest and most common. Install sturdy posts (wood or metal) at either end of your raspberry row, and possibly every 15-20 feet for longer rows. String multiple galvanized wires horizontally between the posts, usually at 2-3 foot intervals, starting about 2 feet off the ground. New canes are tied or woven into these wires as they grow.
T-Post or H-Frame System
Similar to the post and wire, but with an added crossbar at the top of each post, creating a ‘T’ or ‘H’ shape. Wires are then run along the ends of these crossbars. This creates a wider area for canes to grow, preventing overcrowding and allowing for even better light penetration and airflow. The wires can be 2-4 feet apart on the crossbars, depending on how wide you want your hedge.
Materials to consider:
- Posts: Treated lumber (4×4 or 4×6 inches), galvanized steel T-posts, or thick bamboo poles can work for smaller patches. Ensure they are deeply set into the ground (at least 1.5-2 feet deep) and stable.
- Wire: Choose strong, rust-resistant galvanized wire (12-14 gauge is common). Avoid thin, flimsy wire that will sag under the weight of fruiting canes.
- Fasteners: U-nails, staples, or specialized wire tensioners to keep wires taut.
Step-by-Step Trellis Installation
Installing your raspberry trellis is a straightforward process:
- Plan Your Row: Determine the length of your raspberry row. Raspberries prefer full sun, so choose a location that receives at least 6-8 hours of direct sunlight daily. Orient your rows north-south if possible for even sun exposure.
- Set the Posts: Dig holes for your end posts, ensuring they are deep enough for stability. For a wooden trellis, you might use concrete to anchor them. Space additional support posts along very long rows. For a T-post system, simply drive the T-posts into the ground.
- Attach Wires: Starting about 2 feet from the ground, begin stringing your first wire. Secure it tightly to the posts using U-nails or wire staples. Work your way up, adding additional wires every 18-24 inches. The top wire should be around 5-6 feet high, depending on your raspberry variety’s mature height.
- Tension the Wires: For long runs, use wire tensioners to ensure the wires are taut. Sagging wires won’t provide adequate support.
- Plant Your Raspberries: If you haven’t already, plant your raspberry canes along the trellis line, spacing them appropriately for your variety (typically 2-3 feet apart for individual plants, but often closer in a hedgerow system, aiming for about 4-6 canes per linear foot after establishment).
- Train the Canes: As your raspberries grow, gently weave or tie the new canes to the wires using soft plant ties or garden twine. Avoid anything that will cut into the growing stems.
Cultivating Bountiful Raspberries: Essential Care Tips
A trellis is just one piece of the puzzle. Combining it with excellent general care will ensure a thriving raspberry patch.
Sunlight and Location
Raspberries are sun-lovers. They need a minimum of 6 hours of direct sunlight daily, with 8 or more being ideal for the best fruit production. A site with good air circulation, away from competing trees or shrubs, is also beneficial.
Soil and Drainage
These plants prefer well-drained, fertile soil rich in organic matter. A slightly acidic to neutral pH (6.0-6.8) is optimal. If your soil is heavy clay, amend it generously with compost, aged manure, or other organic materials to improve drainage. Raised beds, as seen in the ‘Before’ image, are excellent for ensuring good drainage.
Watering Needs
Raspberries need consistent moisture, especially during flowering and fruiting periods. Aim for 1-1.5 inches of water per week, either from rain or irrigation. Check soil moisture by sticking your finger 2-3 inches deep; if it feels dry, it’s time to water. Avoid overhead watering late in the day, which can encourage fungal diseases.
Planting and Spacing
When planting bare-root canes, ensure the crown (where roots meet stems) is just below the soil surface. For potted plants, plant at the same depth they were in their container. Proper spacing is crucial for air circulation and light. For a hedgerow, allow plants to send up suckers to fill in the row, maintaining about 4-6 strong canes per linear foot. For individual plants, space them 2-3 feet apart.
Pruning for Productivity
Pruning is perhaps the most critical aspect of raspberry care, determining your harvest size and plant health. Raspberries typically produce fruit on either first-year canes (primocanes, common in fall-bearing varieties) or second-year canes (floricanes, common in summer-bearing varieties).
- Summer-Bearing (Floricane) Raspberries: These varieties produce fruit on canes that grew the previous year. After harvest, typically in late summer or early fall, prune back the spent floricanes to the ground. Thin new primocanes (first-year growth) in late winter/early spring, leaving the strongest 6-8 canes per linear foot.
- Fall-Bearing (Primocane) Raspberries: These produce fruit on the tips of current season’s growth. You have two pruning options: a single fall crop (prune all canes to the ground in late winter) or a fall and summer crop (prune only the top fruited portion of canes in late fall, then prune those same canes to the ground after their second summer crop).
Fertilization
Raspberries are not heavy feeders. A balanced slow-release fertilizer or a top-dressing of compost in early spring is usually sufficient. Avoid excessive nitrogen, which can lead to lush foliage but reduced fruit production.
Pest and Disease Management
Good air circulation from trellising significantly helps prevent many fungal issues. Monitor your plants regularly for common pests like Japanese beetles, cane borers, or aphids. Hand-picking, strong water sprays, or insecticidal soaps can often manage minor infestations. Always ensure proper sanitation by removing fallen leaves and old canes to reduce disease overwintering.
Regional Considerations and USDA Zones
Raspberries are remarkably adaptable, growing in USDA Hardiness Zones 3 through 9, depending on the cultivar. However, their performance varies significantly by region:
- Zones 3-5 (Northern Climates): Choose cold-hardy varieties. Fall-bearing raspberries are often favored here, as their canes can be mown down each winter, avoiding winter cane damage. Mulching heavily helps protect roots from deep freezes.
- Zones 6-8 (Temperate Climates): Most summer and fall-bearing varieties thrive here. Pay attention to local frost dates for optimal planting and pruning timing. Adequate summer watering is crucial during dry spells.
- Zones 9-11 (Warmer Climates): Heat-tolerant and low-chill varieties are essential. Some types may struggle with prolonged high temperatures or insufficient winter chill. Consistent afternoon shade in the hottest areas can be beneficial.
Always check with your local agricultural extension service for specific cultivar recommendations and planting calendars tailored to your microclimate and frost dates. Soil temperature is a better indicator for spring planting than a calendar date.
Common Raspberry Growing Mistakes to Avoid
Even with a trellis, a few common pitfalls can hinder your success:
- Neglecting Pruning: Failing to prune regularly leads to overcrowded, unproductive canes that are prone to disease. Understand your raspberry type (summer-bearing vs. fall-bearing) and prune accordingly.
- Insufficient Sunlight: Planting raspberries in too much shade will result in sparse growth and poor fruit production.
- Poor Drainage: Raspberries hate wet feet. Constantly soggy soil leads to root rot and weak plants. Ensure your planting site or raised bed drains well.
- Inconsistent Watering: Fluctuating moisture levels, especially during fruit development, can lead to small, crumbly, or malformed berries.
- Ignoring Pest and Disease Signs: Early detection and intervention are key. Regular inspection, especially when trellised canes are easy to view, helps catch issues before they become severe.
- Lack of Support: While this article highlights the trellis, it’s worth reiterating: without proper support, even the best care won’t prevent canes from sprawling and becoming unproductive.
Cultivate Your Own Berry Bounty!
Embracing a simple wire trellis system for your raspberries is a game-changer. It’s a practical investment that pays dividends in plant health, ease of maintenance, and ultimately, a more abundant and enjoyable harvest of delicious berries. By combining this structural support with thoughtful care regarding sun, soil, water, and pruning, you’ll transform your raspberry patch from an unruly thicket into a productive, beautiful berry hedge.
Ready to reclaim your garden space and enjoy basketfuls of fresh raspberries? Get your trellis in place and watch your plants flourish!