There’s nothing quite like the taste of fresh, homegrown bell peppers. Crisp, sweet, and bursting with flavor, they elevate any dish. But what if you could enjoy that garden-fresh goodness year after year, all from the bounty of a single pepper? That’s the magic of seed saving!
At Garden – L. Quyên, we believe in empowering every gardener to cultivate abundance. Saving seeds not only saves you money but also connects you deeply with the gardening cycle, allowing you to preserve your favorite varieties and share the joy with others. Today, we’re diving into the simple, rewarding process of harvesting bell pepper seeds for planting.
Why Saving Bell Pepper Seeds is a Garden Game-Changer
Before we get our hands dirty, let’s explore why seed saving is such a fantastic practice:
- Cost-Effective: No need to buy new seeds every season! You’ll have a steady supply of your favorite bell pepper varieties for free.
- Preserve Heirloom Varieties: Many unique and flavorful bell pepper types are heirlooms. Saving their seeds helps maintain genetic diversity and keeps these special plants thriving for generations.
- Adapt to Your Climate: Over time, seeds saved from plants grown in your garden may adapt better to your local climate and soil conditions, leading to stronger, more resilient plants.
- Sustainability: It’s an eco-friendly practice that reduces waste and promotes a self-sufficient gardening lifestyle.
- Connect with Nature: There’s immense satisfaction in knowing you’ve grown a plant from a seed you saved yourself.
Choosing the Best Bell Peppers for Seed Saving
Not all bell peppers are created equal when it comes to seed saving. For the best results, keep these tips in mind:
- Opt for Open-Pollinated or Heirloom Varieties: These peppers will produce seeds that grow into plants identical to the parent. Avoid F1 hybrids, as their seeds often produce plants with unpredictable traits or no fruit at all.
- Select Fully Ripe Peppers: The seeds need to be mature. A bell pepper that has fully changed color (e.g., from green to red, orange, or yellow) and is slightly soft to the touch indicates mature seeds.
- Choose Healthy, Productive Plants: Select peppers from your strongest, most disease-free plants to ensure you’re propagating desirable traits.
Step-by-Step Guide to Harvesting Bell Pepper Seeds
1. Prepare Your Workspace
Gather your tools: a sharp knife, a cutting board, a spoon, a bowl of water (optional, for cleaning), and a paper towel or screen for drying.
2. Slice and Extract
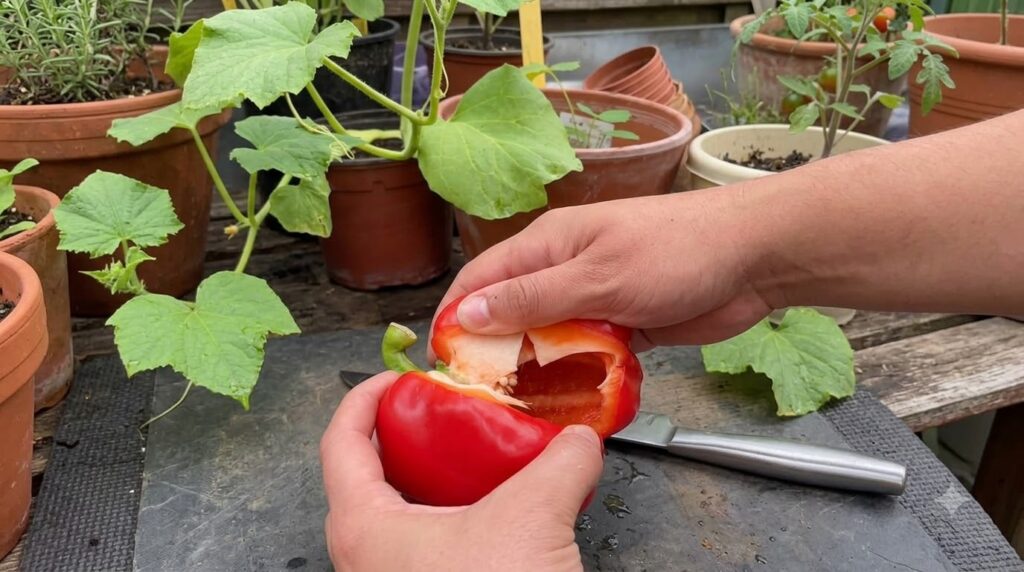
Carefully cut your fully ripe bell pepper in half lengthwise. You’ll immediately see the central core with numerous seeds attached to the white pith. Using a spoon or your fingers, gently scrape or pull the seeds and pith into a bowl.
3. Clean the Seeds (Optional but Recommended)
Some gardeners prefer to ferment their pepper seeds, similar to tomatoes, to remove germination inhibitors and reduce disease. However, for bell peppers, a simple rinse is usually sufficient. Place the seeds in a sieve and rinse them under cool running water, gently rubbing them to remove any clinging pulp or pith. You want them as clean as possible to prevent mold during drying.
4. Thoroughly Dry Your Seeds
This is perhaps the most crucial step! Spread the cleaned seeds in a single layer on a paper towel, a ceramic plate, or a fine mesh screen. Ensure they are not touching each other to promote even drying. Place them in a warm, dry spot away from direct sunlight. Good air circulation is key. It can take anywhere from 1 to 3 weeks for the seeds to completely dry. They should be brittle and snap when bent, not flexible.
5. Store Your Seeds Properly
Once completely dry, store your bell pepper seeds in an airtight container, such as a small glass jar, a plastic zip-top bag, or paper envelopes. Label the container with the variety of bell pepper and the date of harvest. Store them in a cool, dark, and dry place. A refrigerator is an excellent option for long-term storage, as it helps maintain viability for several years.
Tips for Success with Your Saved Seeds
- Test Viability: Before planting a whole batch, you can do a germination test. Place 10 seeds on a damp paper towel, roll it up, and put it in a plastic bag in a warm spot. Check periodically for sprouting. This gives you an idea of your seed’s germination rate.
- Label Everything: It’s easy to forget which pepper is which. Label containers clearly and immediately after harvesting.
- Be Patient: Bell pepper seeds can take a little longer to germinate than some other vegetable seeds. Provide consistent warmth and moisture.
Saving bell pepper seeds is a simple yet incredibly rewarding part of the gardening journey. It closes the loop of nature, allowing you to grow your favorite flavors again and again. So next time you’re enjoying a fresh bell pepper, remember the potential it holds for next year’s harvest!
Happy gardening!