Are you dreaming of a bountiful harvest and vibrant blooms in your garden this year? The secret to a successful garden often starts before a single seed touches the soil: with healthy, viable seeds! Nothing is more disheartening than spending time, effort, and resources on planting only to find out your seeds aren’t germinating. This is where seed testing comes in!
Knowing which seeds are likely to sprout can save you a lot of frustration, time, and money. Instead of guessing, you can easily perform a few quick tests at home to check the viability of your seeds. This guide will walk you through six simple and effective methods to ensure your seeds are ready to thrive, helping you unlock your garden’s full potential from the very beginning.
Why Test Your Seeds?
Imagine carefully preparing your garden beds, diligently planting, and then waiting weeks only to see sparse or no growth. Testing your seeds helps you avoid this common gardening heartache by:
- Saving Time & Effort: No more wasted hours on dead seeds.
- Optimizing Space: Ensure every spot in your garden is used efficiently.
- Ensuring a Good Harvest: Increase your chances of a successful and abundant yield.
- Preventing Disappointment: Start your gardening season with confidence and fewer setbacks.
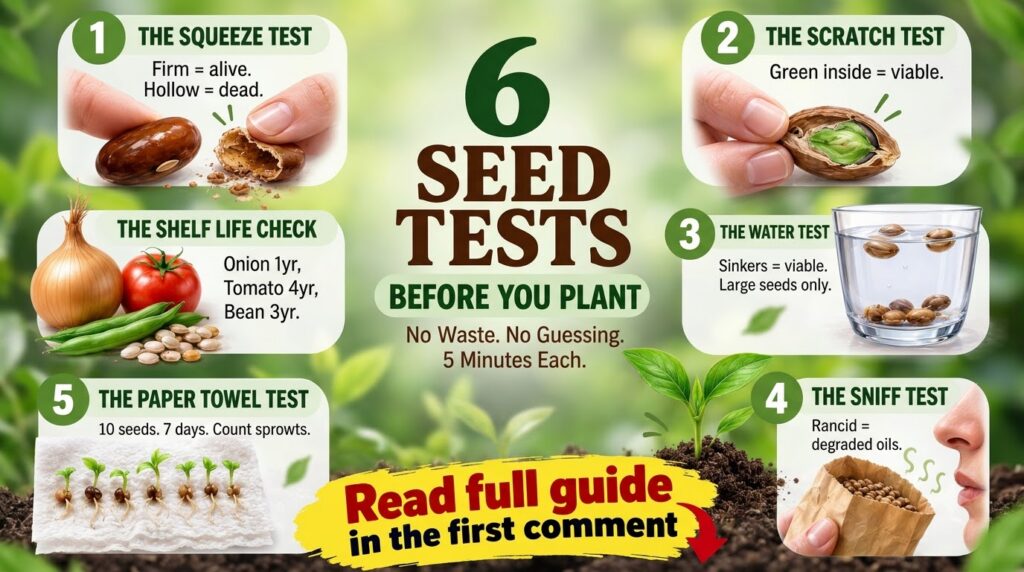
6 Quick Seed Tests for Your Best Garden
1. The Squeeze Test
This test is particularly useful for larger, older seeds. It’s a simple way to check for emptiness or decay within the seed.
- How to do it: Gently press a seed between your thumb and forefinger.
- What it tells you: If the seed feels firm and solid, it’s likely viable. If it crumbles easily, feels hollow, or squishy, it’s probably dead or has deteriorated.
2. The Scratch Test
Some seeds have a tough outer shell. This test helps determine if the embryo inside is still alive.
- How to do it: For seeds with hard coats (like beans or peas), gently scratch or nick the outer layer with a nail file or sandpaper. Be careful not to damage the inner part.
- What it tells you: If you see a pale, healthy-looking tissue underneath the outer layer, the seed is likely alive. If it’s dark, dry, or crumbles away, it might not be viable.
3. The Water Test (Float Test)
One of the quickest and easiest methods, this test relies on density to determine viability.
- How to do it: Drop a handful of seeds into a glass of water. Wait for about 10-15 minutes (or up to an hour for some larger seeds).
- What it tells you: Seeds that sink to the bottom are generally viable, as they are dense and full. Seeds that float are often non-viable, meaning they are hollow, dried out, or damaged. However, some healthy seeds with air pockets might float initially, so it’s best to combine this with another test for absolute certainty.
4. The Sniff Test
Your nose can be a surprisingly good tool for detecting healthy seeds.
- How to do it: Take a small amount of seeds and smell them. You can also lightly crush a few non-essential seeds if you have plenty.
- What it tells you: Healthy, viable seeds typically have a fresh, earthy, or neutral smell. If they smell moldy, rancid, sour, or like mildew, it’s a strong sign that they’ve been exposed to moisture and have spoiled.
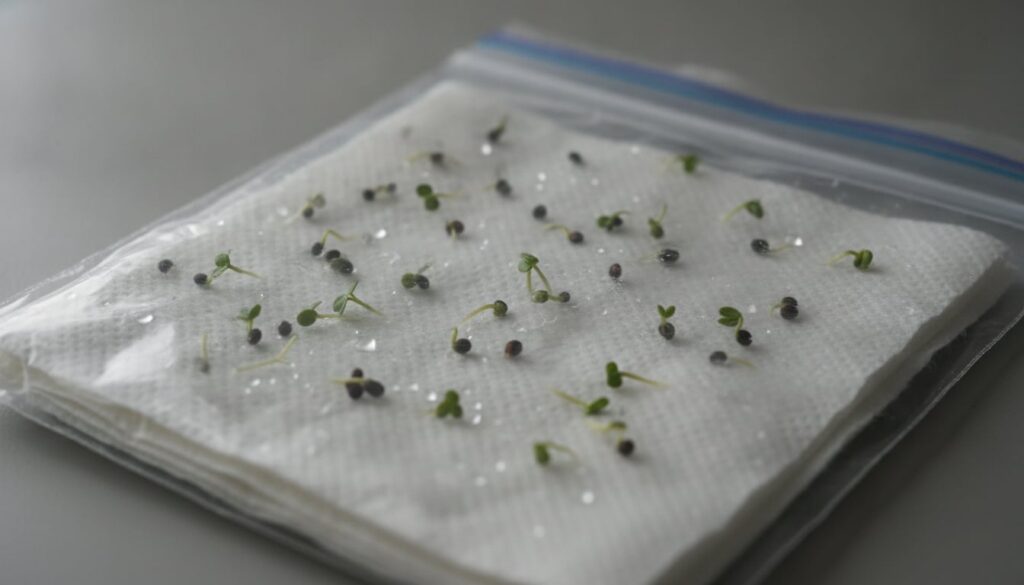
5. The Paper Towel Test (Germination Test)
This is arguably the most reliable method for checking actual germination potential.
- How to do it:
- Dampen a paper towel, but don’t soak it.
- Place 10-20 seeds evenly spaced on one half of the paper towel.
- Fold the other half over the seeds, or gently roll the paper towel with the seeds inside.
- Place the rolled paper towel into a plastic bag or a sealed container to maintain humidity.
- Keep it in a warm spot (around 68-75°F or 20-24°C) away from direct sunlight.
- Check periodically (every 1-2 days) for signs of sprouting, keeping the paper towel moist if needed.
- What it tells you: After a few days to a couple of weeks (depending on the seed type), you’ll see tiny sprouts if the seeds are viable. Calculate your germination rate by dividing the number of sprouted seeds by the total number of seeds you tested (e.g., 8 sprouts out of 10 seeds = 80% germination rate). An 80% or higher rate is excellent!
6. Shelf Life & Storage Conditions
While not a direct ‘test’ of individual seeds, understanding general seed longevity and proper storage is crucial for maintaining viability.
- How to assess: Consider how old your seeds are and how they’ve been stored. Most seeds have a general shelf life (e.g., tomatoes and cucumbers 4-6 years, corn and onions 1-2 years).
- What it tells you: Seeds stored in cool, dark, and dry conditions will maintain viability much longer than those exposed to heat, light, and humidity. If your seeds are past their typical shelf life or have been poorly stored, their viability will likely be significantly reduced. For older seeds, definitely use the paper towel test.
Get Ready for a Thriving Garden!
By incorporating these simple seed tests into your gardening routine, you can confidently start your planting season, knowing you’re giving your garden the best possible start. It’s a small investment of time that yields big rewards in terms of healthy growth and abundant harvests.
Have you tried any of these seed tests before? Share your experiences and tips in the comments below!